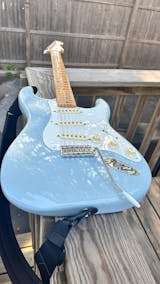
Les Paul Install Demo

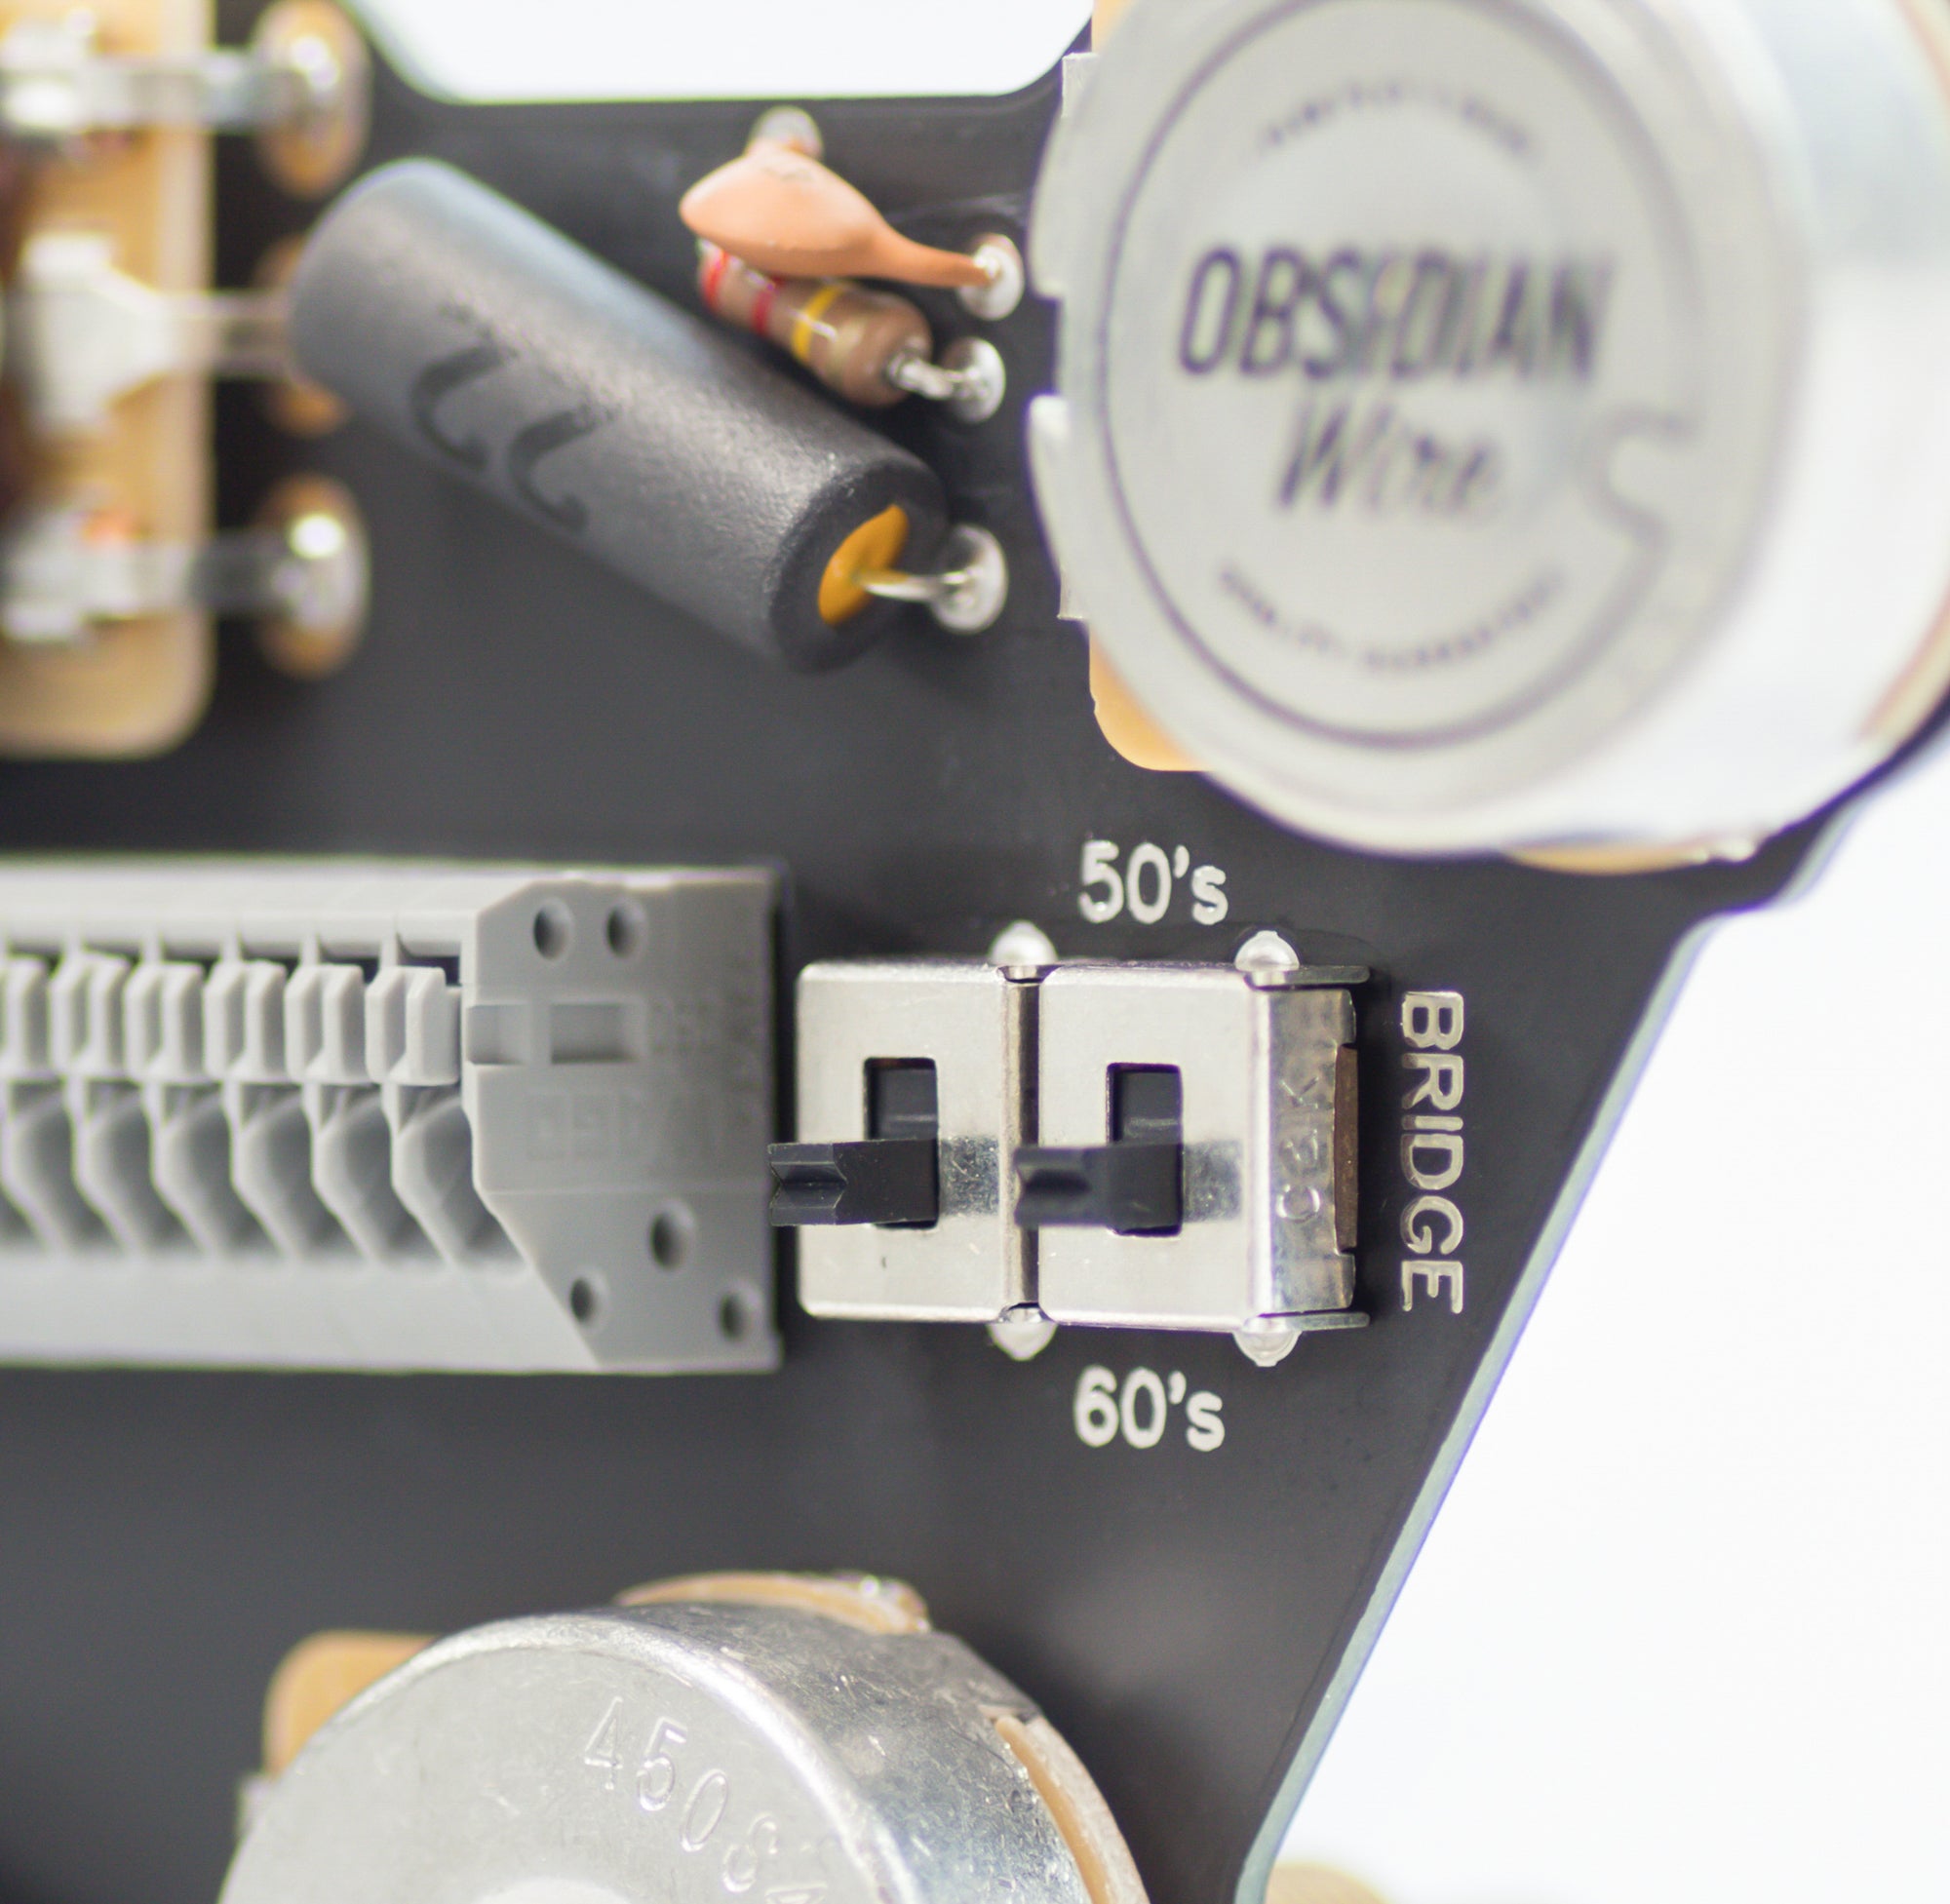
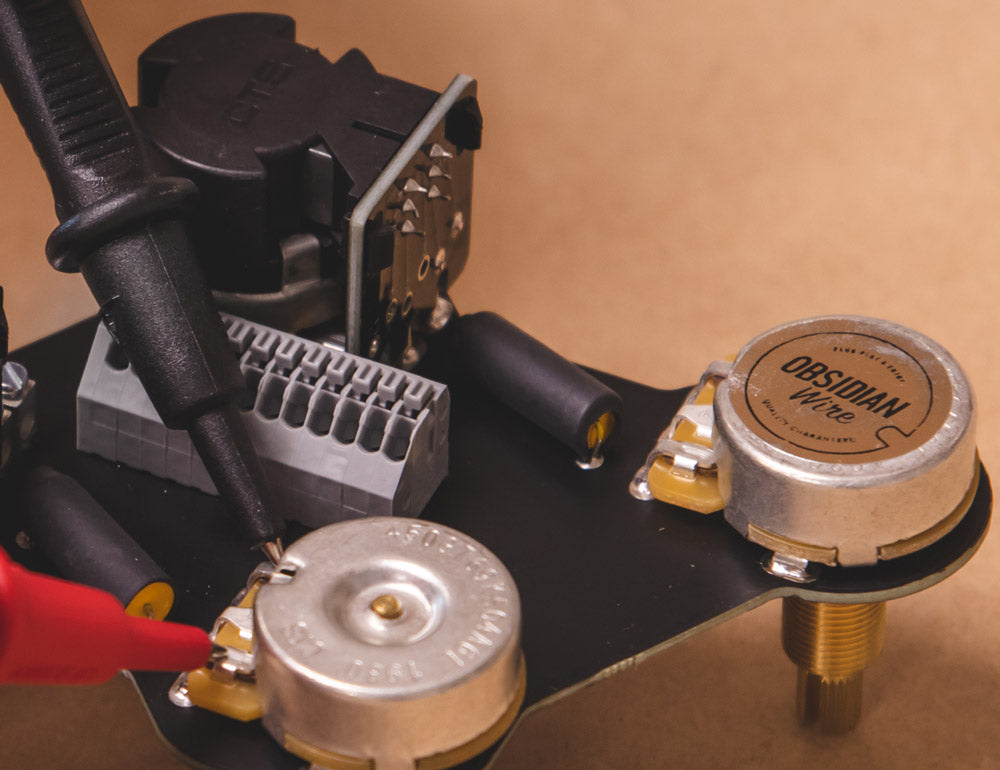
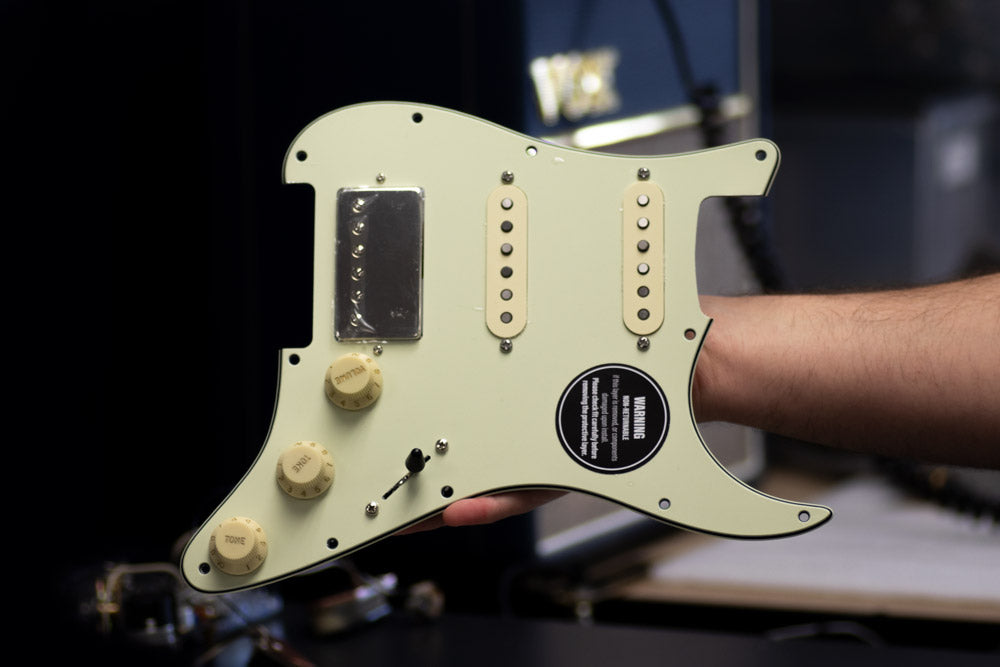
ObsidianWire Vintage MKII for Les Paul®

Easy. Not Instant.

For a secure connection,take your time, and follow directions carefully.

Will it fit?
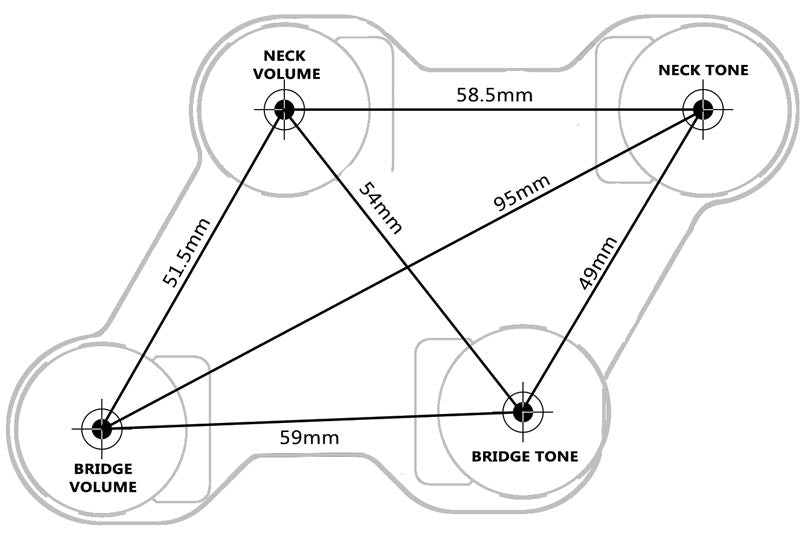
Layout Guide: ObsidianWire for Les Paul

Fits most genuine Gibson Les Pauls.

Fits most Epiphone Les Pauls
with hole size and knob adjustments (Requires 9.52mm Hole & US Spec 24 Spline Knobs)


Always Check Hole Layout
(Measure from inside cavity)


Hole Size: 9.52mm (3/8”)
Cavity Depth: Minimum 32mm (1.26”)
Pot Length: Long Shaft 19mm (3/4") - Can be used in Epiphone with included
height adjustment nuts
Knob Size: Split Shaft 24 Spline US SPEC
Switch Tip: Metric M3.5 x .6 thread

Wiring Diagrams for Les Paul

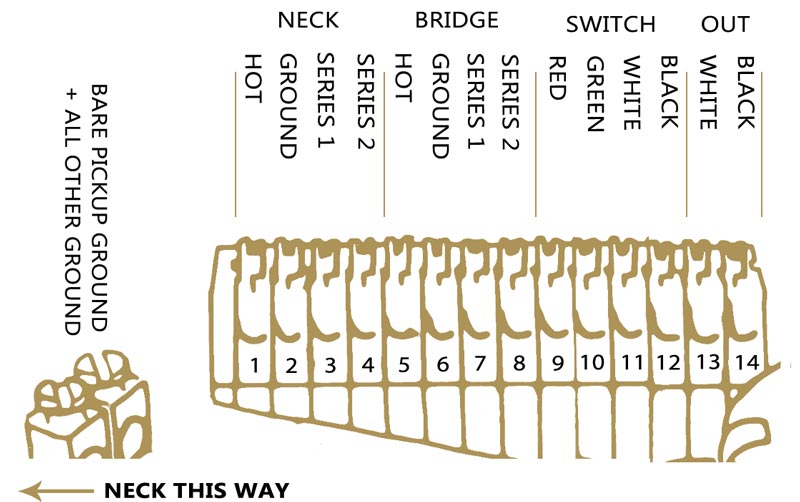
VINTAGE MKII & True Vintage 50s

Four Conductor Pickups

1 = Neck hot
2 = Neck ground
3 = Neck Series 1
4 = Neck Series 2
5 = Bridge hot
6 = Bridge ground
7 = Bridge series 1
8 = Bridge series 2
9 = Switch red
10 = Switch green
11 = Switch white
12 = Switch Black
13 = Output white
14 = Output black

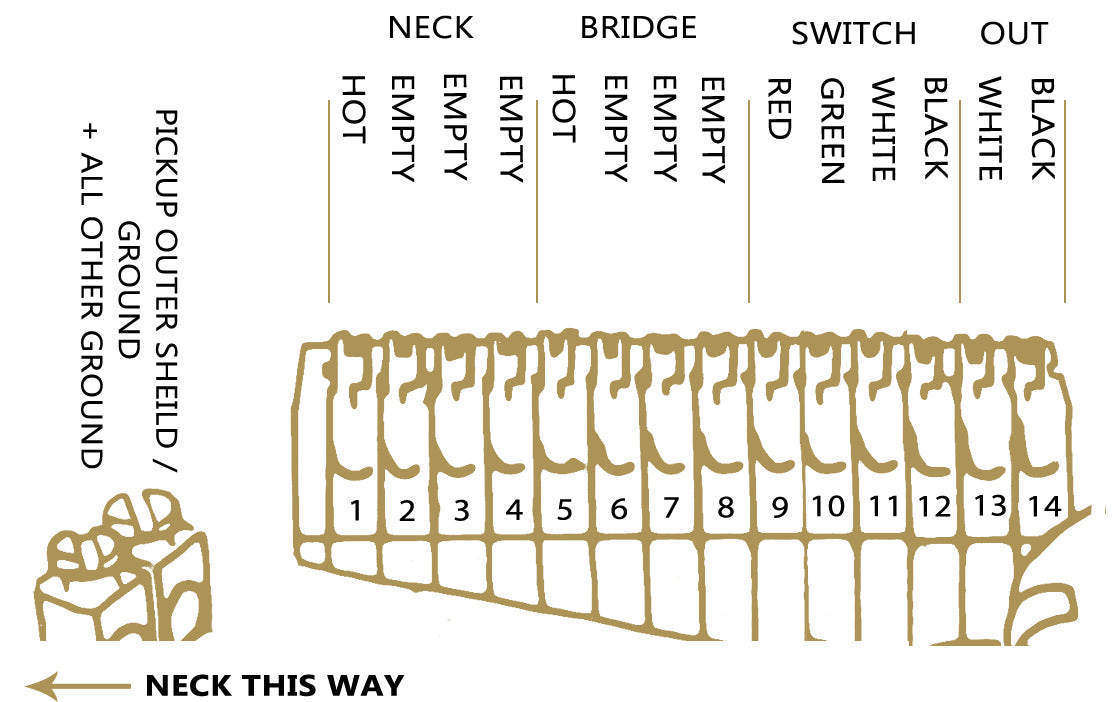
Two Conductor Pickups

1 = Neck hot
2 = Empty
3 = Empty
4 = Empty
5 = Bridge hot
6 = Empty
7 = Empty
8 = Empty
9 = Switch red
10 = Switch green
11 = Switch white
12 = Switch Black
13 = Output white
14 = Output black

For extra help with vintage braided wires see our guide below.


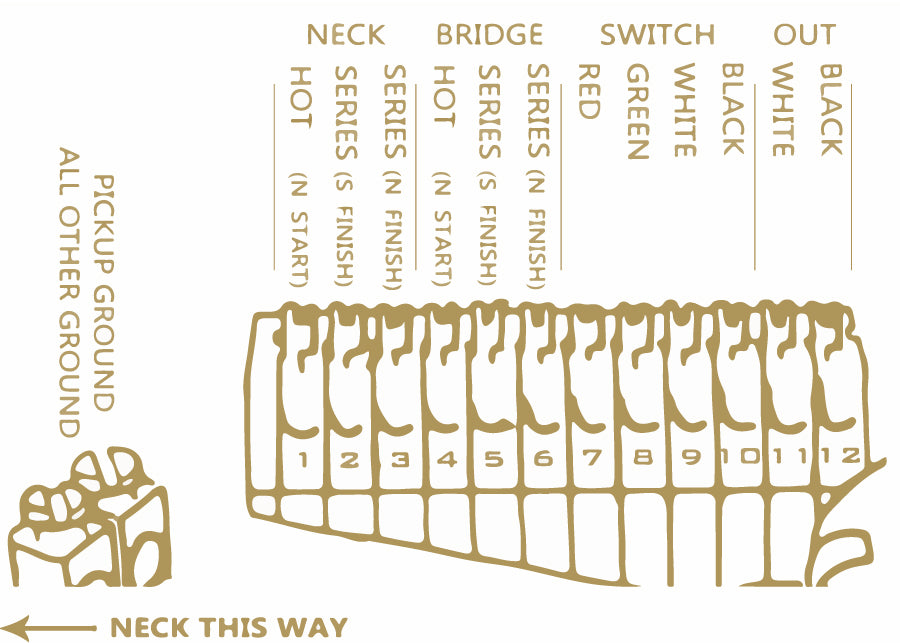
CUSTOM SC

Four conductor pickups

1 = Neck hot
2 = Neck Series 1
3 = Neck Series 2
4 = Bridge hot
5 = Bridge series 1
6 = Bridge series 2
7 = Switch red
8 = Switch green
9 = Switch white
10 = Switch Black
11 = Output white
12 = Output black

Pickup and other grounds to ground posts

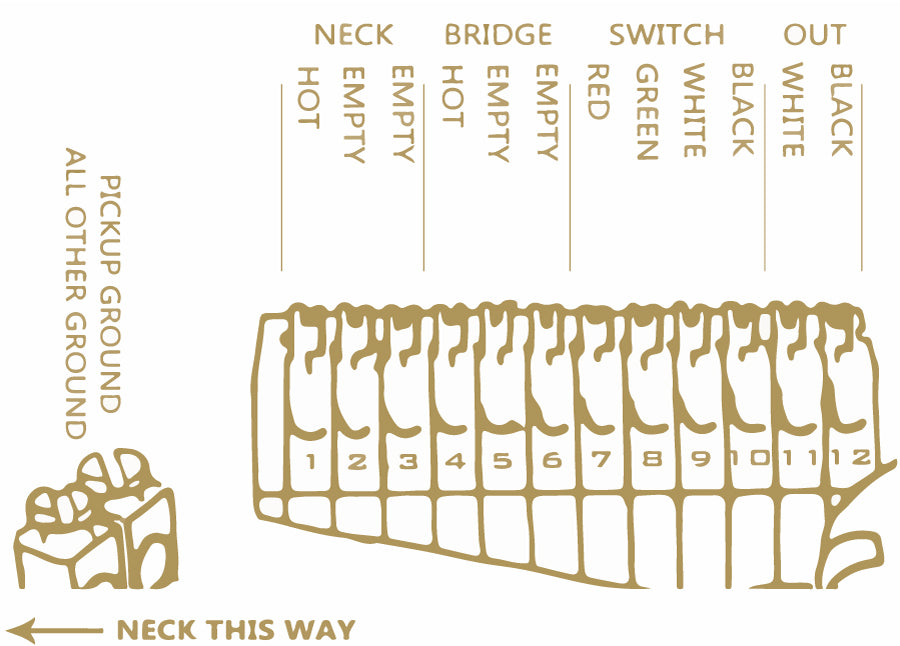
Two conductor pickups

1 = Neck hot
2 = Empty
3 = Empty
4 = Bridge hot
5 = Empty
6 = Empty
7 = Switch red
8 = Switch green
9 = Switch white
10 = Switch Black
11 = Output white
12 = Output black

Pickup and other grounds to ground posts

For extra help with vintage braided wires see our guide below.

Getting Ready

1) Check the fit

Check the Pro-Wired Electronics will fit your Les Paul.

You can print the below diagram as a guide. Be sure to print this to 100% scale.

Ensure - control holes are 3/8" / 9.52mm.

Ensure - Knobs are US Spec 24 Spline models. Metric or Import models will damage your harness.

Les Paul Layout Diagram
2) Find your diagram

Find the appropriate install wiring diagram above.

These diagrams are specific to each product so ensure you use the correct one.

3) Identify your pickup wires

Checkout our guide for popular pickup builders below.

For those not listed, you can use your pickup builders install manual to identify the correct wires.

Pickup color codes

Remove your old harness

4) Clip the wires

Clip the pickup, ground output jack and switch wires from the harness.

Cut these cleanly, and as close to possible to the existing wiring harness, to ensure there is enough length to reach your new Pro-Wired Electronics.

5) Remove knobs

Gently remove your knobs from the harness.

Undo all of the existing mounting nuts for the control pots (potentiometers), switch and jack. 

6) Remove old wiring

Remove the pots, jack and switch from your guitar and set them aside.

Install your new harness

7) Set nut height

Set the nut height on your control pots.

The correct height will depend on your cavities depth.

As a guide set the nuts around halfway for an Epiphone® or just a touch off the harness for a Gibson®. 

8) Install the switch

Feed the wire through the body so the cable reaches through to the control cavity.

This should be pushed through, not pulled. Pulling can cause the cable jacket to slip off.

Install the switch & secure with the hardware provided.

9) Install the jack

Secure your new jack to the jack plate.

Feed the cable through the jack cavity.

Fix the jack plate to the body.

Install the Wires

10) Prepare the Wires

Strip pickup and ground wire insulation leaving 6mm (1/4”) of bare wire.

Be Precise

Twist loose strands of wire between your fingers to create a firm tip.

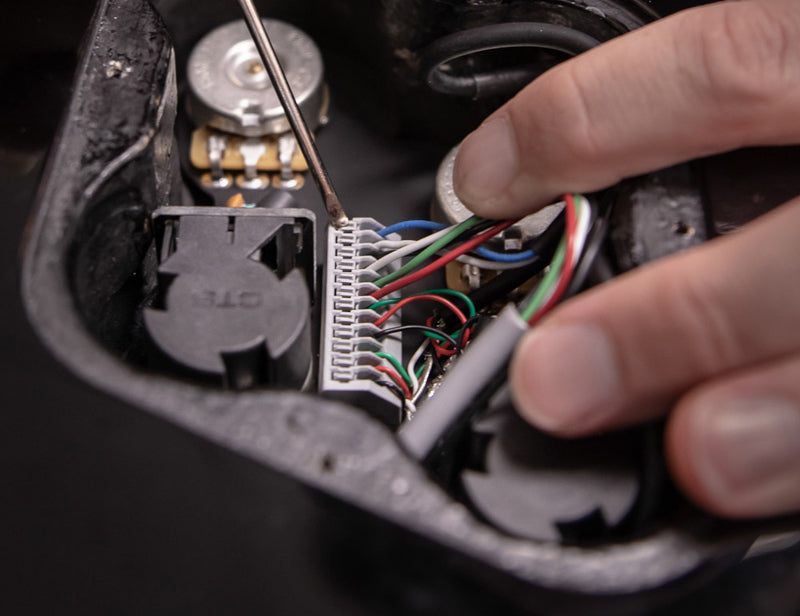
11) Press & hold connector button

Use a fine screw driver to press and hold the connector button above the wire slot.

For a full guide on using the solder-less connectors, check below

Full connector guide
12) Insert wire & release button

Insert the wire to the correct slot at a 45° angle.

Release the button and the wire should hold firmly.

Test the wire by giving it a gentle pull before moving on to the next wire.

13) Insert Ground Wires

Insert ground wires to the screw down connectors and screw down to secure.

These connectors can handle multiple wires.

14) Enjoy...

Re-assemble your guitar with knobs and back plate, and enjoy...

A Guide For
Vintage braided Wire

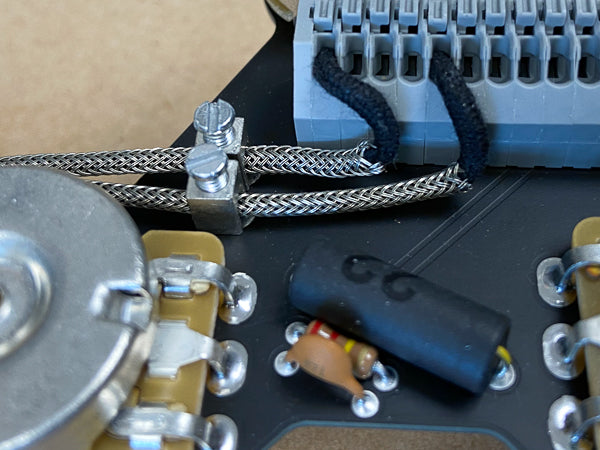
ObsidianWire Pro-Wired Electronics for Les Paul® are designed to also work perfectly with vintage style braided shield cable. For these pickups

Inner core wire = Hot
Outer Braid = Ground

Strip the outer braid (ground) from the end of the cable, to ensure good separation from the inner core (hot).

The entire cable can then be fed through the screw down ground connector

More Help?

Trouble Shooting
Click here
Pickup Color Codes
Click Here
ObsidianWire Solderless Connector Help
Solder-less Connector Help
Click Here